So yeah, I guess I owe the team (and the readers) a part three to the bodywork fabrication. Where we left off on
part 2 was partway through sanding the first filler coat on the molds. After all the molds had filler applied and been sanded smooth, we did it again to fill in the little divots and imperfections that remained. The next step was to tape the molds with a layer of packing tape. We do this to preserve the molds so that they can be reused - just in case the release coatings don't work as well as they should.
 |
| JP Taping the nose cone |
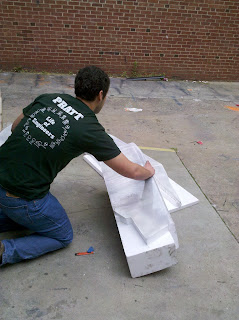 |
| Costi taping a sidepod |
Click through for the rest...
Next, we spray 3 coats of PVA on the molds as a release agent. PVA dissolves in water, so it's relatively easy to release the parts from the molds by apply water and force.
Finally, we can start layering the carbon fiber onto the molds. The process is pretty standard, but we have to make sure to lay up the top layer in a cosmetically pleasing fashion.
 |
| Strategic cuts where you have small radii are important |
 |
| final layer |
Then, apply epoxy, peel ply, vacuum bag, and off we go. We did 3 layers this time around for all the parts.
Coming out of the vacuum bag, here's what the parts looked like:
Still some sanding to do at this point - that's the problem with vacuum bags - they will scrunch up any extra material you leave, creating ridges/bumps. That's why you'd ideally have a female mold rather than the plugs we're using. Still, these are some of the better parts we've done straight out of our molds.
We also have to make all the cutouts in the pieces to make them fit over all the various things sticking out of our car. We have front wing cutouts, radiator support cutout, and the muffler support cutout. Finally, we can paint the pieces.
 |
| Hard at work priming the bodywork |
 |
| Finally, Duke blue bodywork. |
Of course, we have to attach the bodywork to the car too. We use Dzus fasteners most of the way around - and this year we've made use of industrial strength velcro to attach bodywork. The side panels are attached with Dzus fasteners across the top and velcro around bottom, the side pods attach to the side panels via Dzus fasteners on top and velcro around the bottom to the diffuser, and the nose cone attaches to the frame with one Dzus fastener on top and velcro to the front wing on the bottom (see the trend?). All those tabs had to be welded to the frame (I think right around here is when our TIG welder broke...)
And finally, the finished product before all those stickers go on.


No comments:
Post a Comment