Hey everyone,
I will explain the whole process we use to make uprights. Once you have your finalized Solidworks model for your upright you need to buy the stock needed for the operation.
 |
| Front Upright Solidworks Model |
 |
| Rear Upright Solidworks Model |
A general rule of thumb is to have about 2 extra inches in both the max width and max length of your part as your stock size. The thickness should be the same given that when stock is sold it will be slightly thicker than what you actually order giving you enough to play with to make them perfectly flat.
Once you have your stock you can export your Solidworks model to MasterCam where you can prepare the files for the mill.
You can now start the actual machining. The first step is to drill the holes in the bottom and top of the upright. Given that those are the only operations in those directions it will allow you to then do the rest of the machining on the two bigger sides. You can see pictures of how the set up for machining the holes works here:
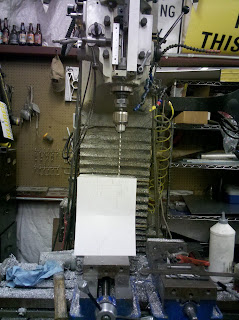 |
| Drilling Holes on Upright stock |
Once all the holes are set you can put the "front" side of the upright up and make sure that it is oriented like you did in your MasterCam file. Remeber to add the files to the floppy disk and rename them with a number .DNC .
The set up for the next orientation would look like this:
You can run all your operations in this side and make sure to include a hole that goes all the way for the middle hole so that when you flip your stock you can center find it. You should also add holes outside of your piece so that you can bolt it to the sacrifice piece. When making slants on your uprights something that works well is to first do rough cuts with a flant 1" diameter end mill and then do the 3/4" ball end which will be the faster combination for machining and give you the better finish too.
Once all operations on this first side are done you can flip it, bolt it to the sacrifice piece and center find it to know where your zero is again. Once this is done you can run all the operations for this side which should end with the upright being completely cut out. You can see some pictures of the machining process here:
You can see the images of the finished uprights here:
 |
| Front Uprights |
 |
| Danny Holding Front Upright |
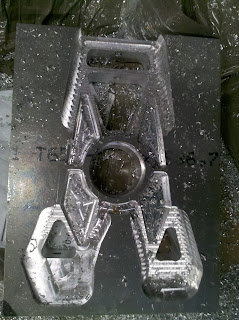 |
| Rear Upright Coming Off Mill |
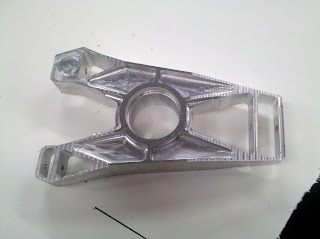 |
| Rear Upright once it is cleaned up |
Make sure that when you do your second front upright and your second rear upright they should be a mirror of the first one!


No comments:
Post a Comment